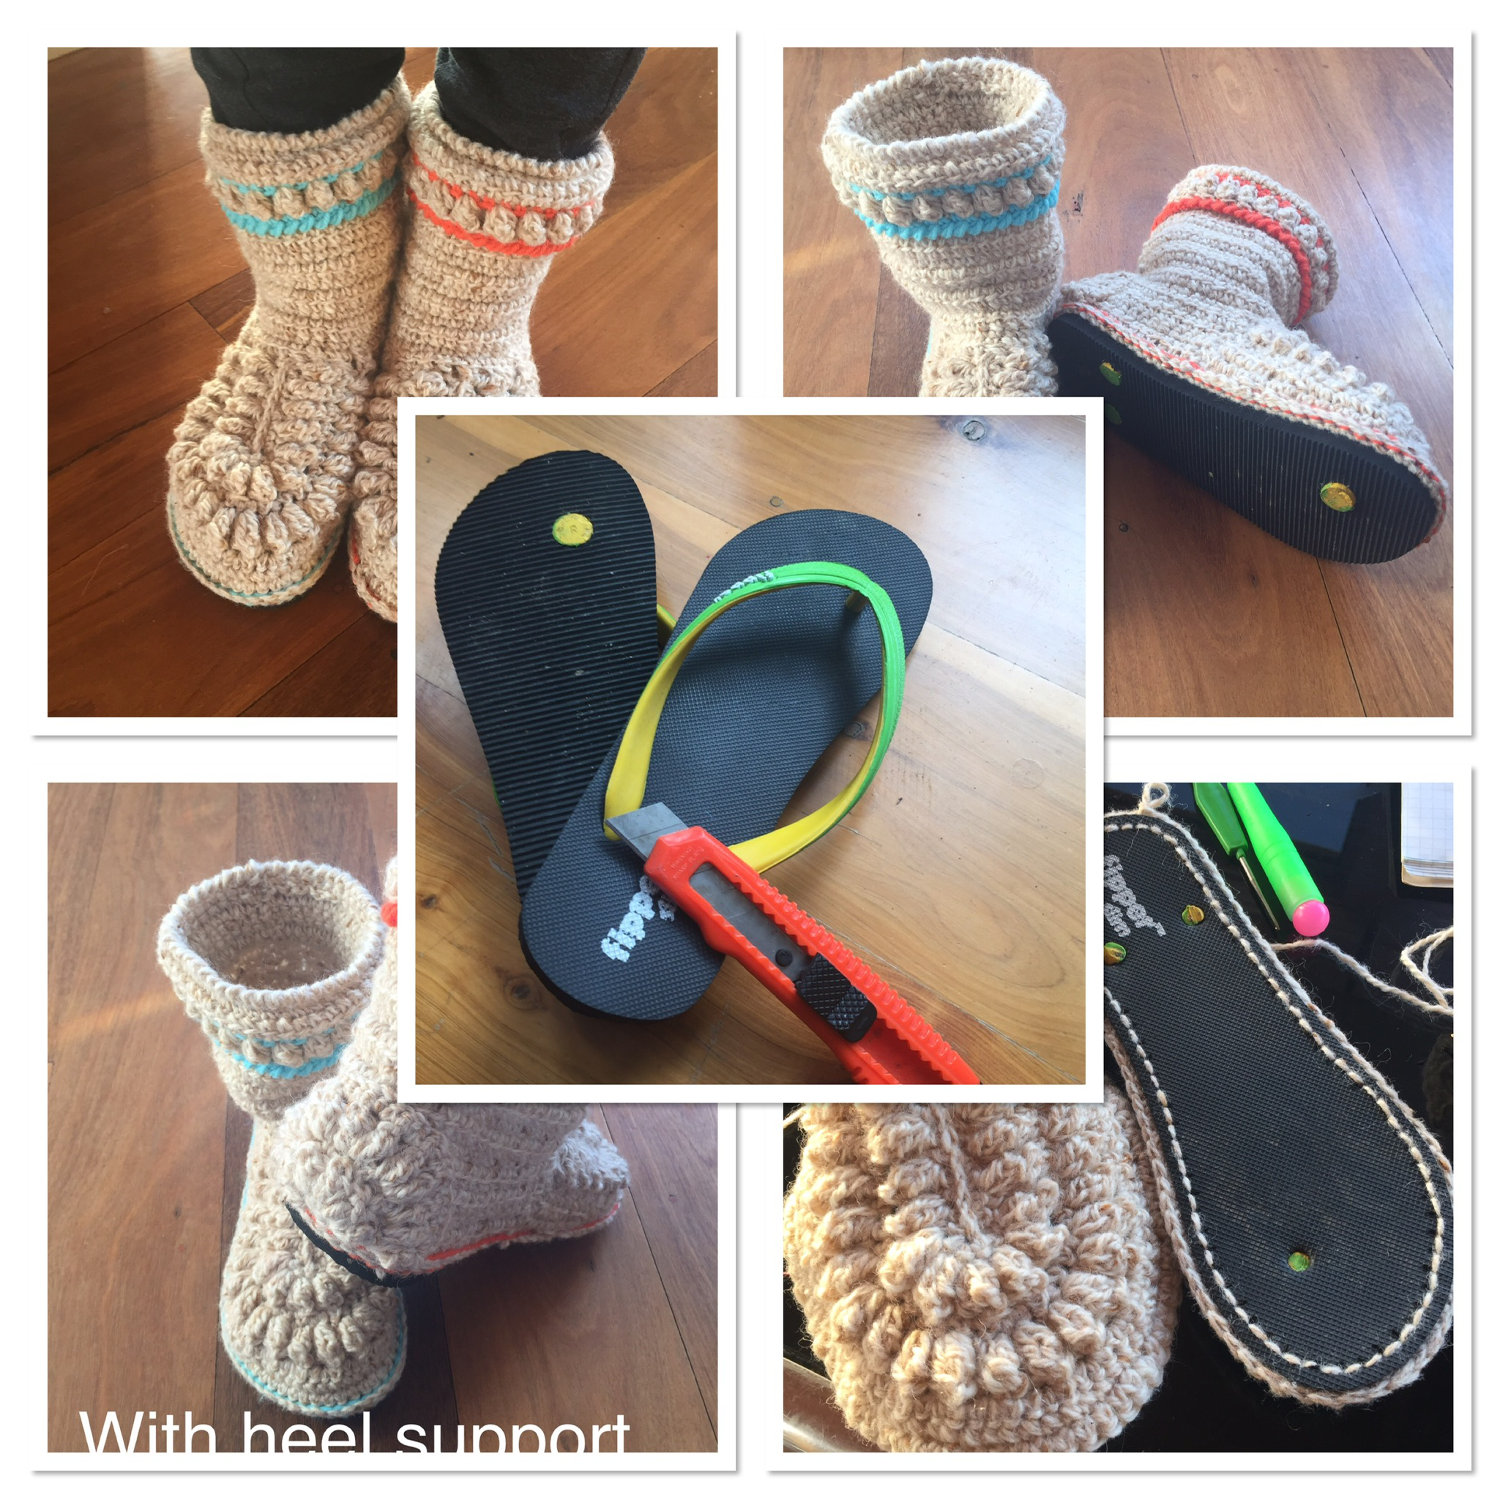
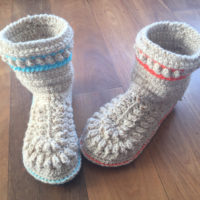
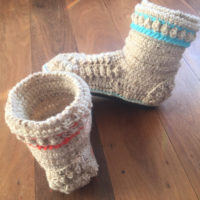
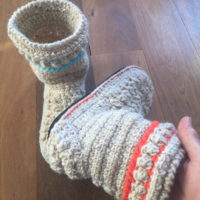
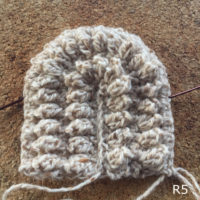
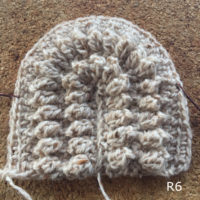
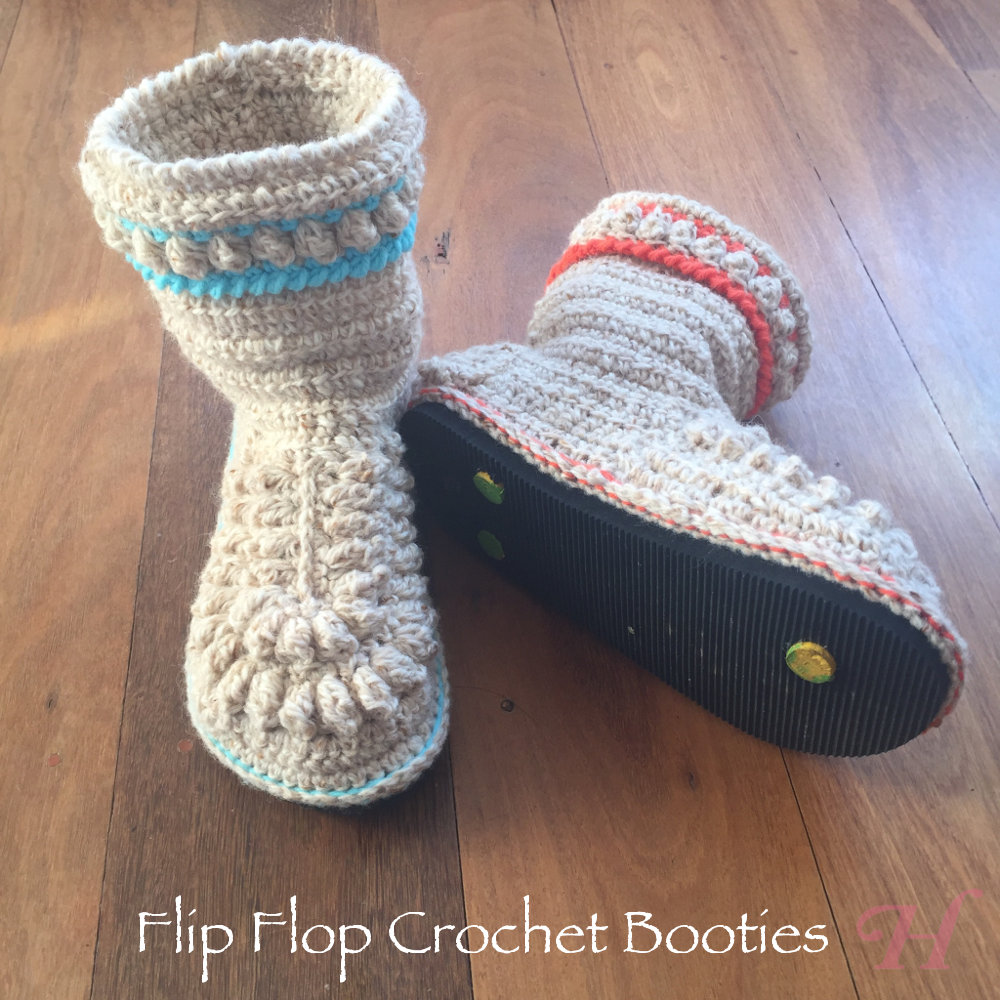
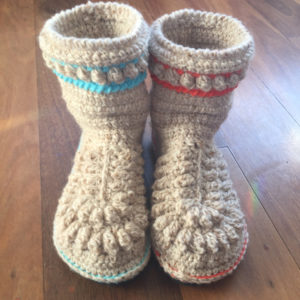
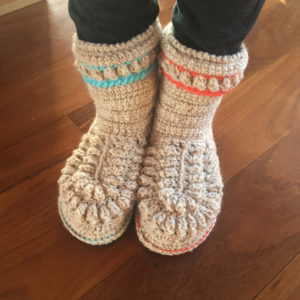
Flip Flop Crochet Booties – This is my first crochet booties using a pair of flip flops (aka slippers, thongs). So there was a lot of frogging and experimentation along the way. I will try my best to detail the steps I took.
The Experimental Non-Crochet Soles bootie that came before …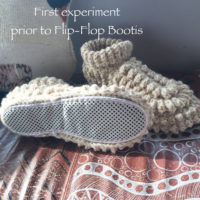
I actually made this pair (to the right) before I made the Flip Flop crochet booties. That was my first experiment in attempting to attach a non-crochet sole to a crochet shoe. I don’t have all the detailed steps for that but at the end of this article (or maybe in another post), I will write up as much details as I have on this pair of booties.
This may seem like a very long post. But it is actually much easier to make this Flip Flop Booties than to write it up, let me tell ya! (҂◡_◡) ᕤ
Flip Flop Crochet Booties Technical Details
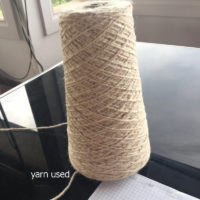
(note: I used a non-branded yarn I bought off a friend, Annette Piper. It is some kind of natural fiber, possibly wool or wool blend. It is quite hard, hardy, strong, and warm.)
Hook: 3.5mm for main work (I used half a size smaller than I normally would to give me a stronger, denser fabric)
2mm hook for attaching yarn to soles
Terminology: US crochet terms & universal crochet symbols
Size: AU 5.5 – 6 (22.5 – 23cm) See: Shoe Sizing Chart by tomsaustralia.com.au
You can adapt this pattern to your size. If you have smaller/larger size, you can:
- use smaller/larger crochet hook
- use correct flip flop size for the soles
- use thinner/thicker yarns
- decrease/increase number of stitches for the straight part of the front section (vamp)
- decrease/increase number of stitches for the back part of the boots
Steps to Make the Flip Flop Crochet Booties
Note: Please use my steps more as guides rather than definitive instructions. There are many ways of making these flip flop crochet booties.
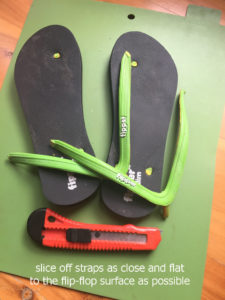
Preparing the Flip Flop Soles – Cut off the Straps
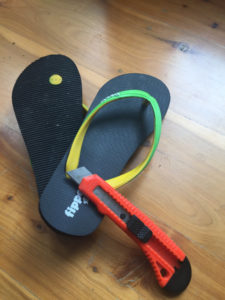
Get a pair of flip flops. I had a pair handy. It was seldom used and quite new.
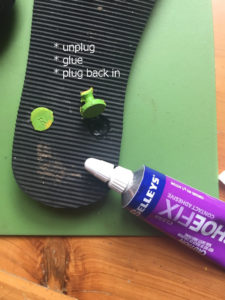
I prefer to deal with the “plugs” left in the flip flops at this stage. Trying to do this later after the bootie has been made is just asking for hard work!
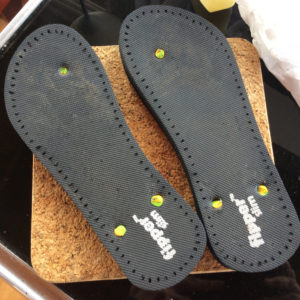
Push the little “plugs” out of the flip flop. (I sanded down the tops a bit to make sure there were no poky bits inside the boots later on.)
Apply glue around the hole and plugs. This is for extra safety – so that the plugs will not fall out later during use.
Plug/glue them back in.
Marking Holes Along/Around the Soles
As the flip flops are going to be the soles of our boots, I will interchangeably call them “flip flops” or “soles”.
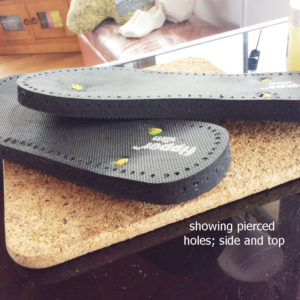
We need to have holes all round the soles. I want the holes along the sides as well as along the top of the soles.
We also want the holes to be quite evenly distributed. You can do it the “eyeball” method, or measure and mark. I happen to have a long acquired but brand new leather marking wheel so I will be using that. (That is one of the benefits of being a avid shopper and hoarder!!!)
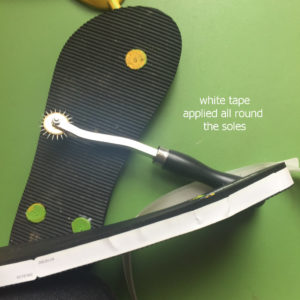
However it is not possible to see the holes made by the marking wheel on the rubber flip flops. So I had to come up with a way whereby I could visually see the marks that the marking wheel would make.
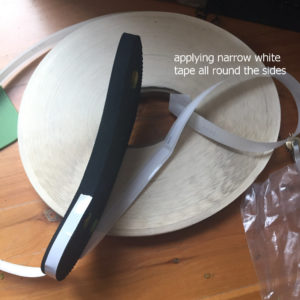
Once again, thanks to the hoader in me, I had a reel of white, narrow tape. So I taped this all round the sides of the sole.
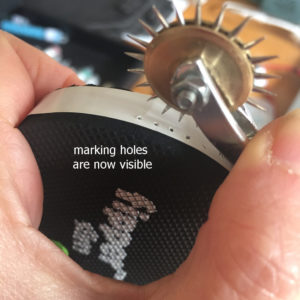
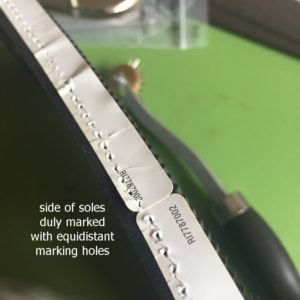
Now when I use the marking wheel along the sides, the holes are clearly visible.
Note:
- you may have noted that the holes are a bit too close. I will be using every alternate marked hole. Many recommend the distance between the holes to be about 1cm.
- The holes along the sides are approximately along the mid-height of the soles. It is not clear in the above photos (due to the black colour of the soles) but that will be clear in the photos below.
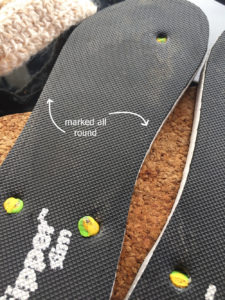
I want to poke holes from the sides of the soles, at an angle, up to the upper part of the soles. It is generally recommended that the holes along the upper should be about 1/4inch (≈ 0.6cm) from the edge of the soles.
When you start poking the holes, you can just judge the distance visually. I am a bit OCD and decided to mark the upper part of the soles as well.
You might need to click for the larger photo to see the details more clearly. You will be able to see that I have marked an outline on the upper side of the soles. (Tip: you can you the sharp tip of the awl to further define the marked line.)
Piercing the Holes Around the Soles
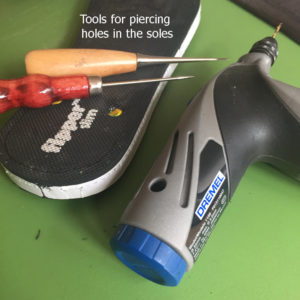
You can use anything thin, sharp, and strong to create the holes in the soles.
I used awls and a Dremel drill.
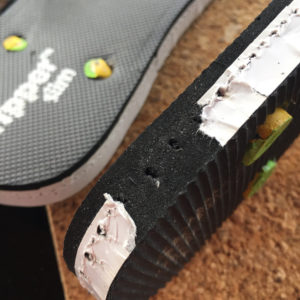
I used the awl to pierce from the side, angled up to the top – from the markings on the white tape to the outline on the upper of the sole.
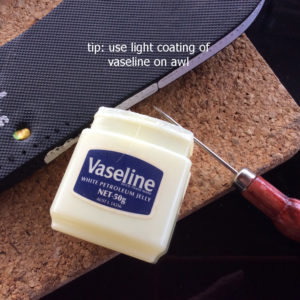
Tip: occasionally giving your awl a light coating of vaseline. It helps a lot make the work easier. It is quite strenuous on the wrist and hand otherwise.
After piercing with the awl, I used the Dremel to drill and kind of clean up the holes. This is an optional step.
White tape is removed and cleaned up as I worked.
Stitching Round the Soles
You can attach your crochet bootie to the sole:
- along the top stitching on the upper of the sole or
- along the stitching on the sides of the sole
Here I have decided that I will be attaching my crochet bootie to the stitching along the side of the sole.
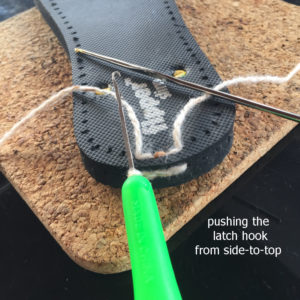
That decision determines whether I hook the yarn by going from the
- top to the side holes or
- side to the top holes
Let me explain …
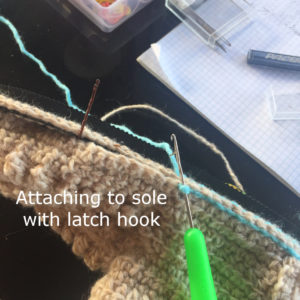
There are various ways of attaching the yarn to the sole. And various tools you can choose to use, e.g. crochet hook or latch hook. I chose to use the latch hook as I find that easier.
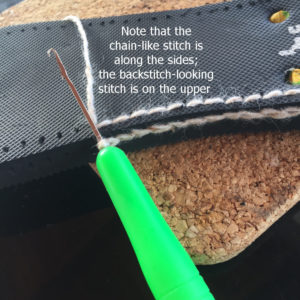
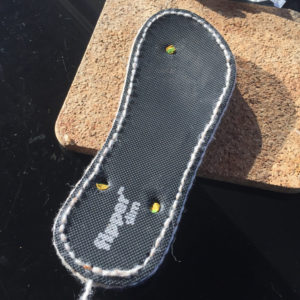
You can see that the chain-like stitches are along the sides of the sole. I will be using these to attach the body of the crochet bootie later on.
For this foundational beginning, use either the bootie’s main yarn or choose another strong yarn to start off.
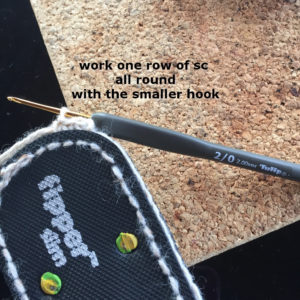
To prepare that, use the smaller (2mm) hook and work 1 row of sc (single crochet) along the sides of the sole. It is to this row of sc that I will use to join to the crochet bootie later.
Now onto the …
Crochet Booties!
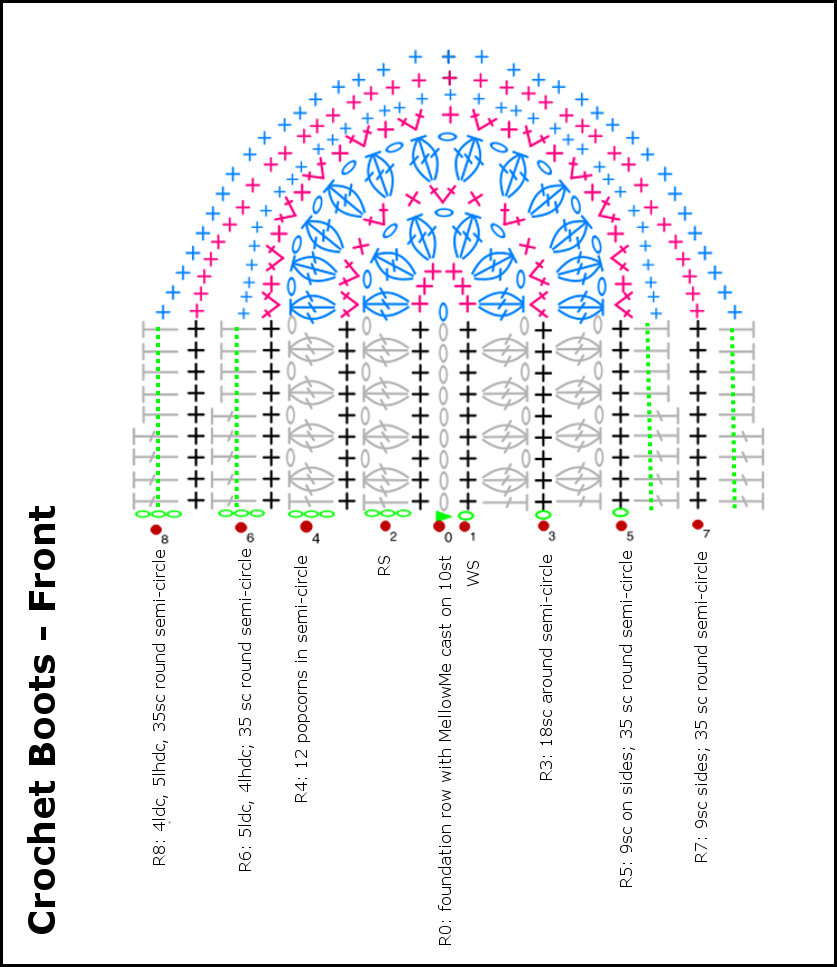
We will start with the front part of the crochet booties.
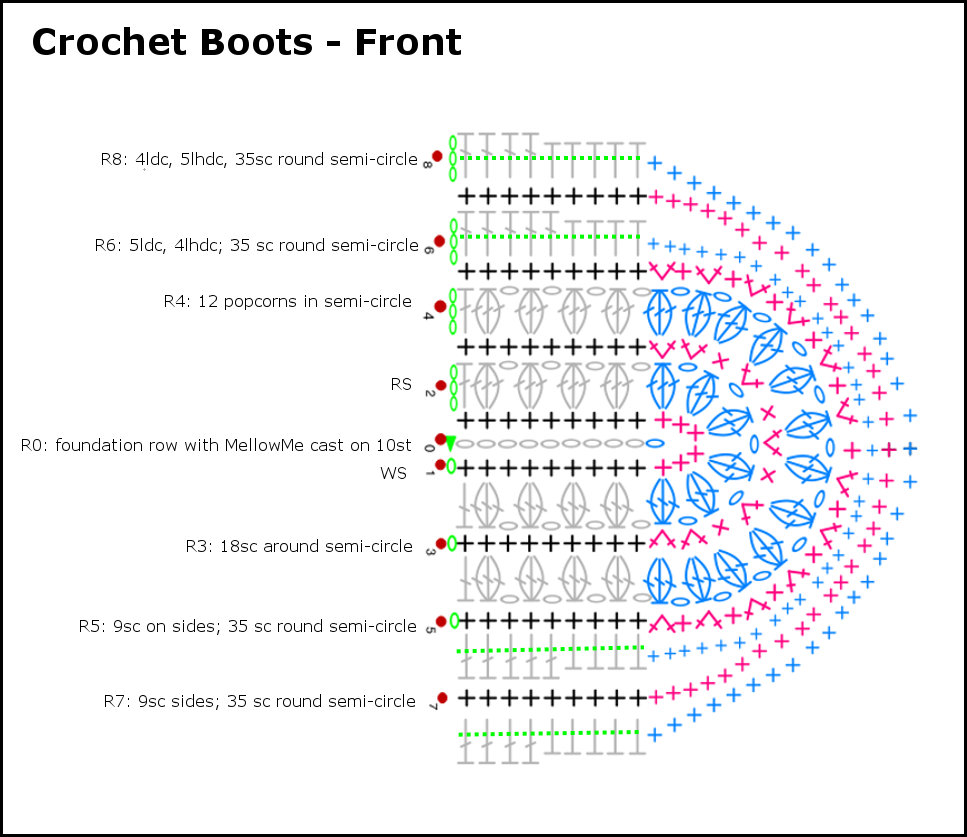
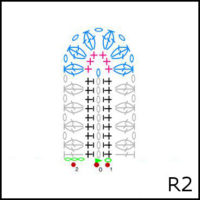
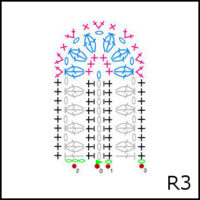
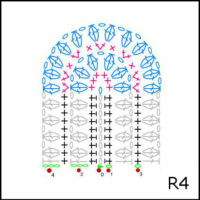
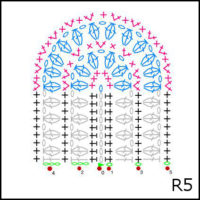
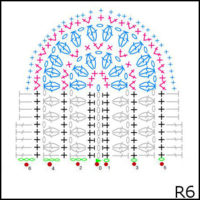
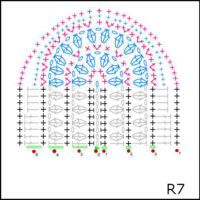
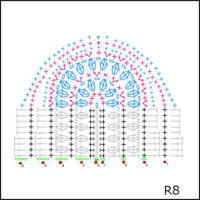
My preference is always to work with crochet symbols charting. I hope this works for you too.
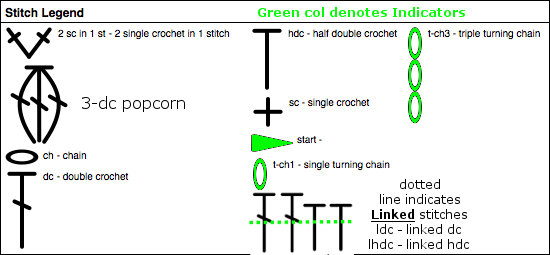
Look below these charts for my brief explanations to some of the conventions I have used in the charting.
Explanation To Accompany Crochet Charts
(with reference to Crochet Pattern charts above)
Green Symbols
You will note in the chart that I have greened the starting stitches to start a row. I am using the green as an indicator only to make things easier. There are many ways of starting a row; you can use whichever method is best for you. I personally prefer the “standing” method to begin each row. (Please refer to references below.)
Linked Crochet Stitches – Green Dotted Lines
I used the green dotted lines across the dc and hdc to indicate that they are linked crochet stitches. Linked crochet stitches gives a firmer and closer fabric. It avoids those unwanted holes that comes with longer crochet stitches. (Please see References below if needed.) But if you don’t know/don’t link linked crochet stitches, then just work normal dc, hdc, tr etc.
Colours and Alternating Rows
In the crochet chart, I have made the semi-circle part colourful. And used alternating blues and pinks.
This is to help distinguish the parts more easily and the alternating colours help with deciphering which row you are working on.
The alternating black-grey rows on the straight part of the pattern serve the same purpose.
Let’s Crochet!
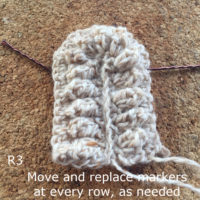
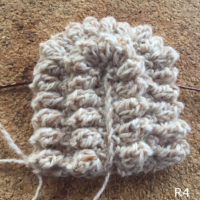
Crochet Boot Front – Make 2
(I think this section of the boot is called the “vamp”.)
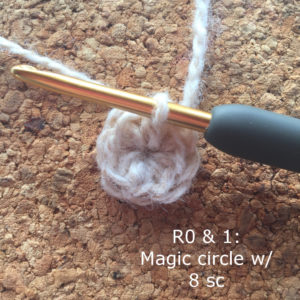
R0: Foundation row. MellowMe CastOn
You can just cast on 10 sts as you normally would. But you might notice I wrote “MellowMe cast on” in the charts. It is my favourite way of starting a crochet foundation row and would highly recommend it.
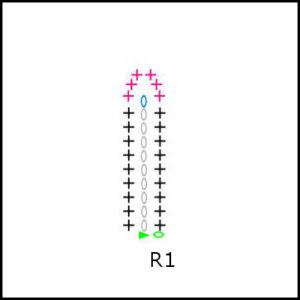
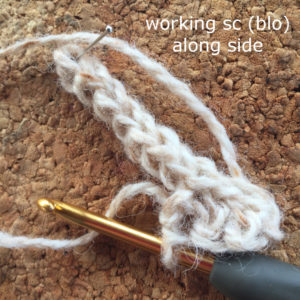
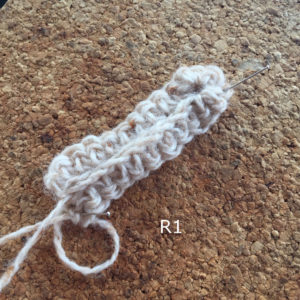
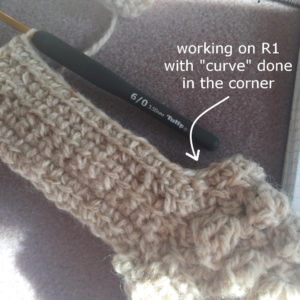
R1: 9sc (blo if using MellowMe foundation/cast on method) along side, 6sc into the end st to form the beginning of semi-circle, 9sc (blo) along the other side
Note:
- sorry, I forgot to indicate on the chart that I worked in the blo (back loop only) along the sides
- stop giggling! I can’t help that R1 looks the way it does!!!!!
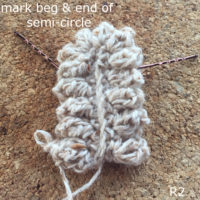
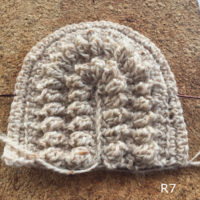
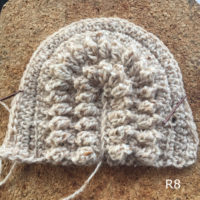
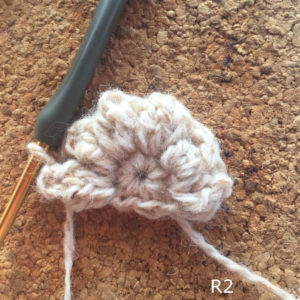
R2 – 8:
Crochet Boot Back – Make 2
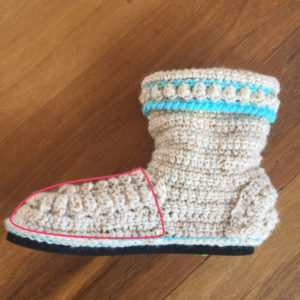
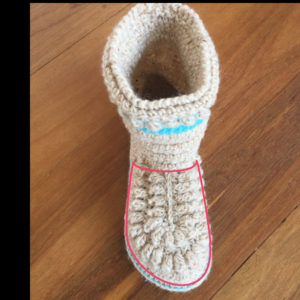
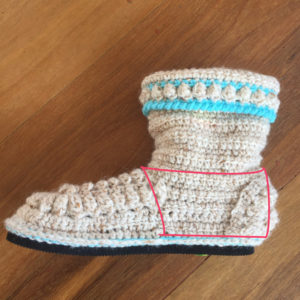
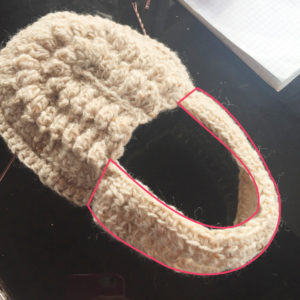
Next we will make the lower back part of the boots. The pink outline indicates the area we will be creating.
The number of stitches you will need will depend on the size/length of your soles.
For my size (AU5.5), I needed another 35 stitches.
You estimate this by placing the front portion you have made around your soles. The balance on the soles is the length you will need.
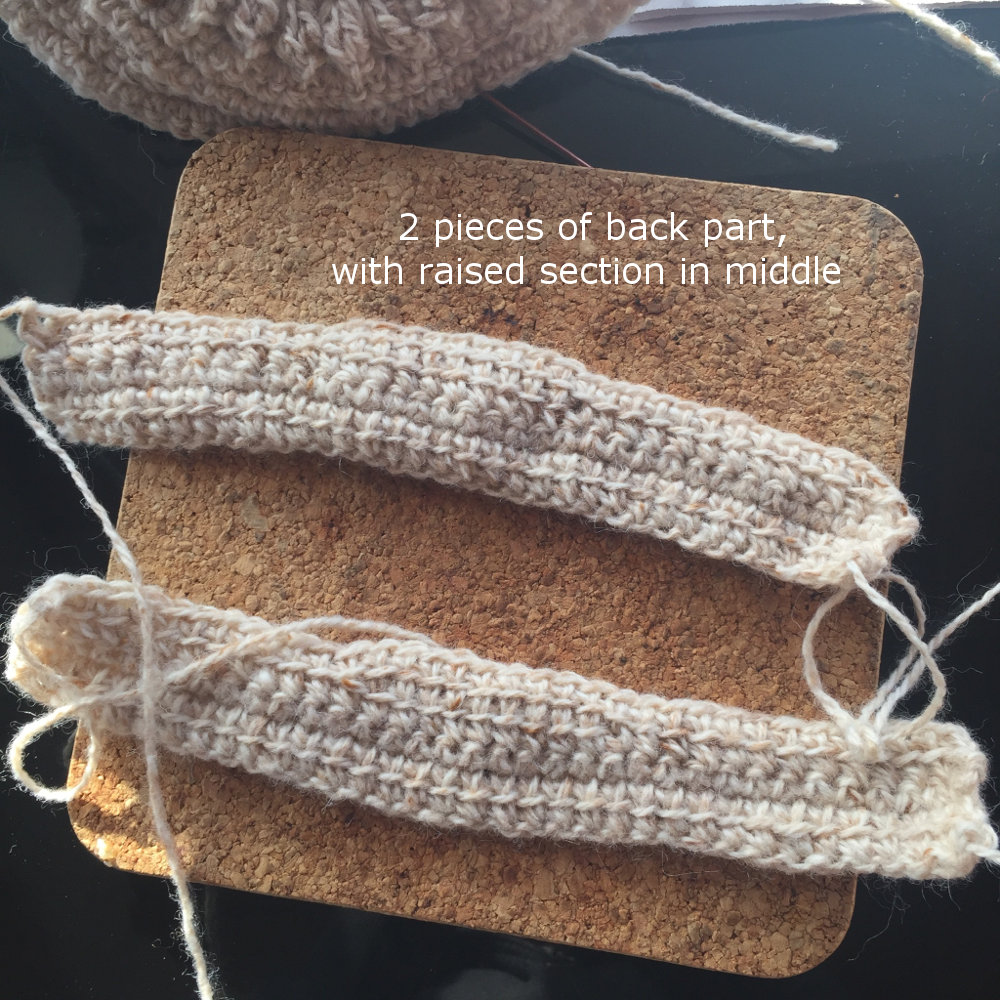
R0/Foundation: 35 sc (I used the MellowMe cast on, discussed above).
R1: 35ldc (Linked Double Crochet)
R2: 35sc
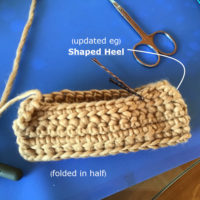 R3: 13LDC, 9LTR (linked treble), 13LDC (This gives a raised height to the back for the heel.)
R3: (updated) 13 LDC (Linked dc), 2LTR (Linked treble), LTR2tog, 1LTR, LTR2tog, 2LTR, 13LDC (This gives both a raised height as well as shaping to the back of the heel.)
Cut yarn, leaving enough of a tail to weave in later. (I left about 8-12″ so I could use the tail to sew one side of the back band to the front of the bootie.)
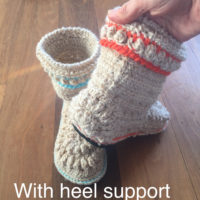
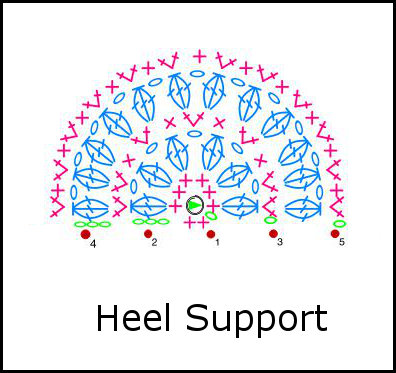
Heel Support – Make 2
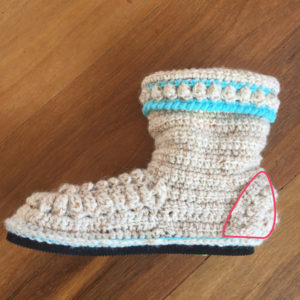
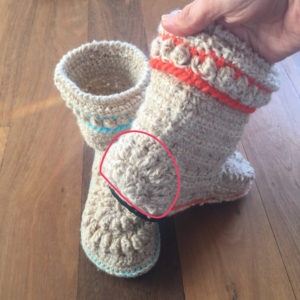
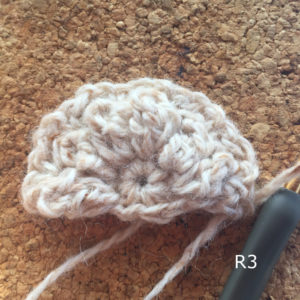
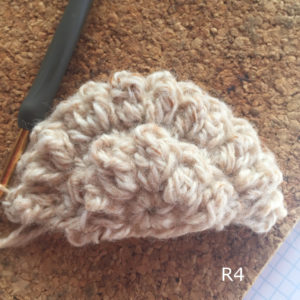
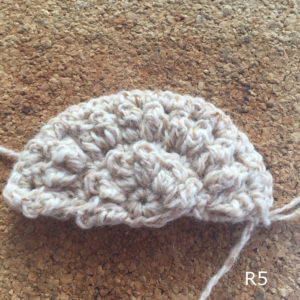
Make 2 semi-circles for the heel support. (I think this is called the “counter”. Don’t ask me why!!!)
They are going to be virtually identical to the semi-circle part of the front piece we made above.
Tip: you can leave a long tail (approx 24inches) after you finish each heel support. The tail can be used to attach to the heel support to the bootie at a later stage.
Update::I am currently wearing this pair of boots and putting it through its paces. I actually think that the heel support should be a bit higher. I am afraid I will have to leave that to you. I will amend these instructions when I have had a chance to make another with higher heels.
Update (July 2021): I am not going to make another updated graph. But you can make a higher heel support by making the group of center popcorns with trebles rather than dc. So, in
• Row2, the center 2 popocorns are made with tr and in
• Row4, the center 4 popcorns.
Putting Together
Front & Back
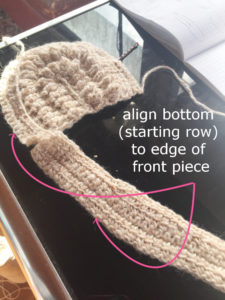
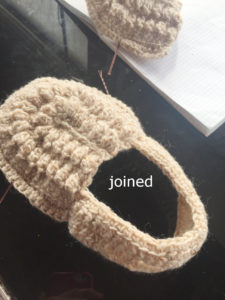
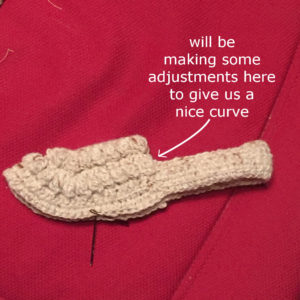
Sew/crochet the front part and the back straps together. Check that you have aligned the bottom (beginning row) of your back straps to the outer edge of the front section (vamp).
Shaft
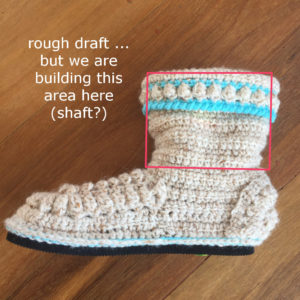
I believe the next section of the boot is called the shaft. We will be crocheting round the collar and building up the boot to create the boot’s shaft.
Note: I will be using linked stitches whenever possible to produce a non-holey fabric for the boots.
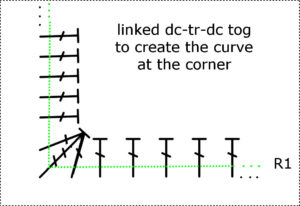
R1: LDC all the way round but with (LDC-LTR-LDC tog) at the corner to create a smooth curve there (see images below)
R2: sc all round (I have approx. 42-43 stitches. Yours will depend on the size you are making, esp how many stitches you had when making the back part of the boots.)
R3: LDC all round
{Repeat (R2 & R3) x5 more times ==> ending with R13}
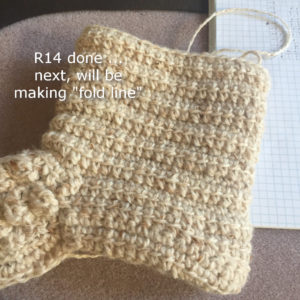
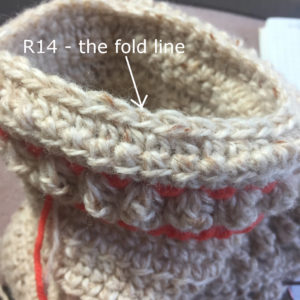
R14: sc all round
Fold-Down Cuffs
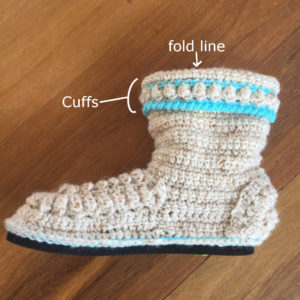
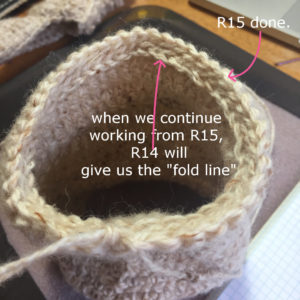
Next, we will make the fold-down cuffs. But first, on R15, we will make a fold-line that will give us a nice fold. And I will be using it for a nice finish later on as well.
R15:
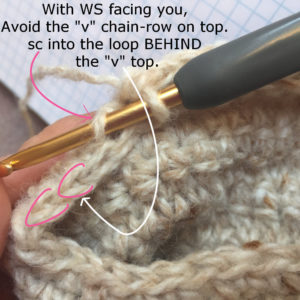
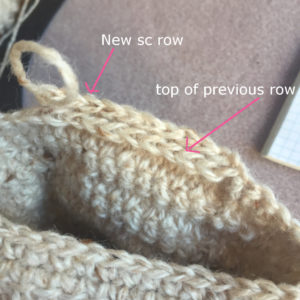
There is a “v” or chain-like row at the top of the last row (R14). We want to retain this v-look.
sc all round into the back-back loop only (bblo). Refer to images below.
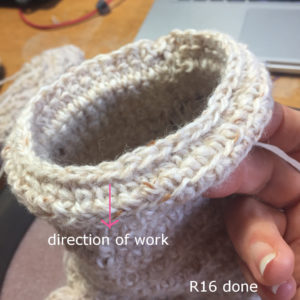
R16: ldc all round
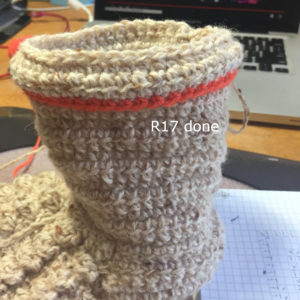
R17: sc all round. [Opt. Change col if desired.]
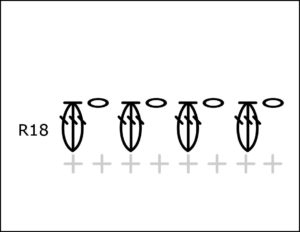
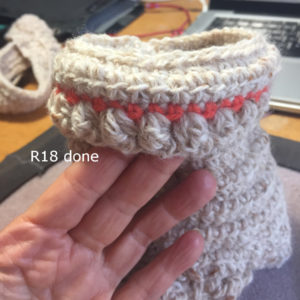
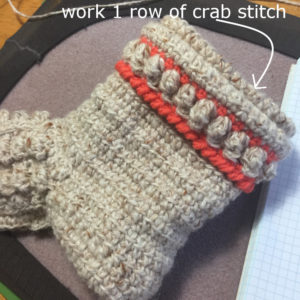
R18: [back to original col] (3dc popcorn, 1ch) rpt all round. (Adjust if you have odd number of stitches.)
[If you are using colour as shown here, you an cut the main yarn after this row.]
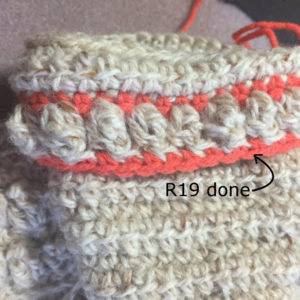
R19: Change yarn colour. SC all round.
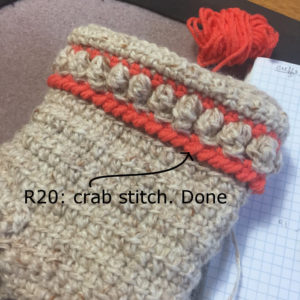
R20: Still using colour, crab stitch (reverse sc) all round. Cut yarn. Neaten.
Finishing the Fold Line
Go back to the top (R14) where we made the fold line. The row of “v” we left is perfect for making a nice, finishing row or crab stitch. Then cut yarn. Neaten.
Attach Heel Support
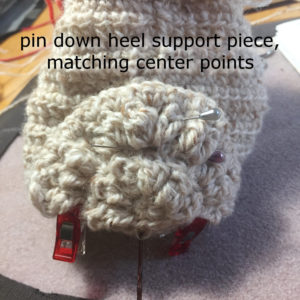
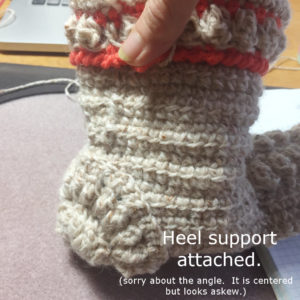
Match center of heel support to the center at back of boots. Pin down. Sew/crochet heel support to boots.
Attaching Crochet Boots to Flip Flop Soles
Remember we left our soles prepared with one row of sc all round.
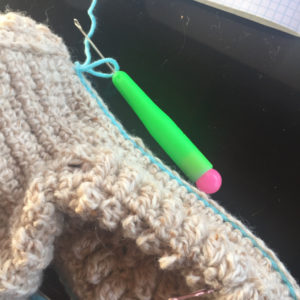
There are various ways of attaching the boot to the sole: sewing, crochet hook, sewing awl. I chose to use a smallish latch hook. You can also choose to use the main colour of yarn if you like.
That’s it, we are done! (Of course you have to do both sides of the boots!!)
- Flip Flop Crochet Booties (CH0522 -n/a)
Important Parting Message!!!
This was my first pair of flip flop crochet booties. I am wearing them now. And I must confess that will it works well and satisfied much of what I was hoping for (most notably, to have soles that would not wear out so fast like my previous crochet soles did), there is room for improvement. So please do expect perfection.
I am off to try and make improvements in new pairs. I will either update this post or write a new updated version another time.
Hope this all helped. And if you made it to this point – Super Congratulations!
References:
- crystalsandcrochet.com: Starting and Standing Stitches
- makeanddocrew.com: “Breckenridge” Crochet Boots with Flip Flop Soles, Part 1
- makeanddocrew.com: How To Crochet Boots with Flip Flops – Free Pattern & Video
- makeanddocrew.com: Taos Crochet Slipper Boots with Flip Flop Shoes, Part 1
- mogglyblog.com: Linked Double Crochet Stitch (ldc)
