How to make and put together Tapestry Crochet bags sequentially
I was hooking away at my amigurumi and then pop! I was into making tapestry crochet bags!! I don’t even know how that transition happened. But I have been seriously and happily busy having fun with tapestry crochet ever since. In this article, I will discuss the method to put together a tapestry crochet bag the ClearlyHelena way!
First, my way of making a tapestry crochet bag is not going to be the same as the other ways I have found on the internet. And also different from the famous Colombian Wayuu Mochila bags. I will detail these differences below.
Basic Stitches for Tapestry Crochet Bags
These below are not the typical crochet stitches used in crochet tapestry. Nor are they the typical stitches used in Wayuu Mochila bags. They are stitches I prefer because they produce such a strong, solid fabric with hardly any holes (so stranding yarns are well hidden). And they are ideal for crocheting graphed images.
Knit-Single Crochet Stitch
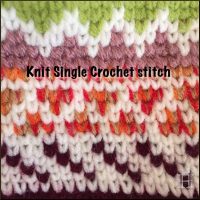
I mainly use what I call the knit single crochet stitch (aka waistcoat stitch) which produces a dense, very strong fabric with stitches that look deceptively like stockinette knitted stitch. The knit sc stitch is also ideal for crocheting graphed images because, unlike the standard sc, the knit sc stitch stack nicely on top of stitch below, with only a minor slant (toward the left).
Most tapestry crochet tutorials and tutorials on the making of Wayuu crochet bags will show a different crochet stitch. I do like the one mainly used in Wayuu crochet bags (i.e the “Modified Single Crochet Stitch – Tapestry Crochet” – the video of which you can find in article how-to article on Knit-sc stitch). But that stitch does produce horizontal raised banding for very row – which might not necessarily be what you want.
Shallow Double Crochet Stitch
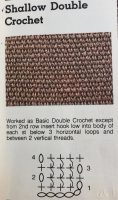 The shallow double crochet stitch is the secondary main stitch I use in tapestry crochet. It also produces a very firm, strong, and dense fabric. This stitch does not produce a clear knitted stockinette look.
Note: Having a strong, dense fabric for tapestry crochet is important because:
- it yields a strong, strudy bag which will not stretch and stretch with load and use
- the densitiy of the fabric mean that it is easier to hide stranding (unused) yarns when working with multiple colours
Bottoms/Bases for Tapestry Crochet Bags
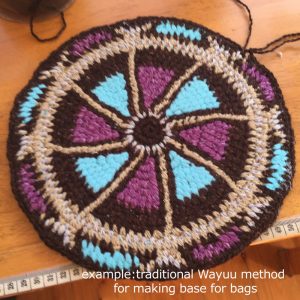
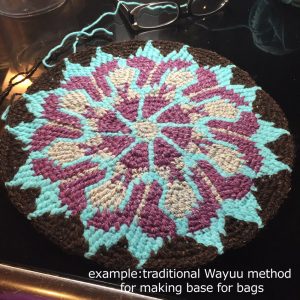
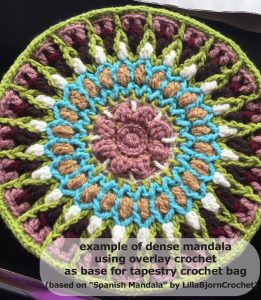
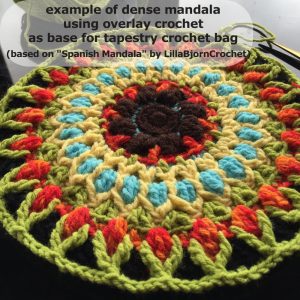
I make bag bottoms either using the traditional Wayuu bag-bases method or I crochet a dense Mandala. You can find many examples of the Wayuu bag bases on Pinterest or via Google.
Note: For base of Wayuu bags or for mandalas, normally start with MC (magic circle) of 8 stitches to produce a flat circle.
Examples of Traditional Bases for Wayuu Bag
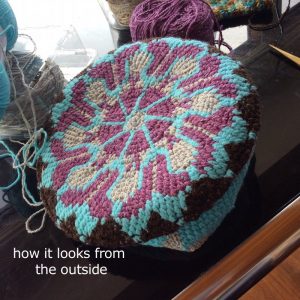
Example of my use of Dense Mandala as Base for Tapestry Crochet Bags
At the time when I made my first tapestry crochet bag (“Cat and Fishes“), I had not once come across anyone making tapestry crochet bags with a mandala base. And I thought, “Why not?” Right?
So I looked around for a dense Mandala pattern. And I found a lovely one – “Spanish Mandala” by LillaBjornCrochet and I bought the pattern from her Etsy store. Using the yarn I do, it produces a very large mandala. For making my tapestry crochet bags, I have not had to use the entire pattern – I stop when I think that the diameter is large enough for my bag.
Another Option: Elevating Bag Feet (Bag Making Hardware)
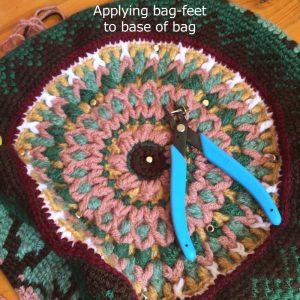
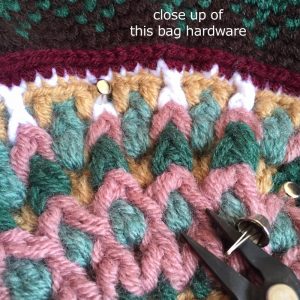
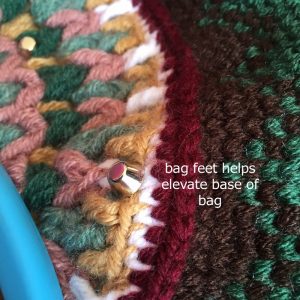
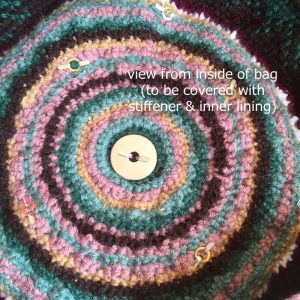
There might be times when you want your bag to have some “feet”. These feet will help elevate the base of your bag when they are resting on the ground, etc. If you do decide to have feet for your bag, then insert the hardware not too long after you finish the base of the bag. Either right after you finish crocheting the round base (but before you insert the stiffener piece) or while the bag is not too deep. It is easier to insert the bag feet when the bag is not so deep.
Making Solid, Strong Bases for Tapestry Crochet Bags
The bases of your tapestry crochet bags should be made of a dense (crocheted) fabric to give it strength and to ensure there are no holes at the bottom. This is doubly essential if your bag is not going to have any lining (as with almost all traditional Wayuu bags). And even though I generally prefer to have full linning (and pockets) for my tapestry crochet bags, I still choose to have a dense, strong crochet base to go with the bag.
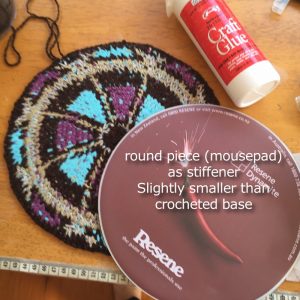
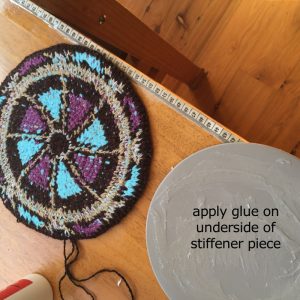
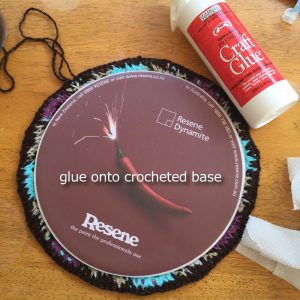
Below is an illustration of how I further strengthen the base of the bag for lasting durability. I add a stiffener piece to the crocheted base. In the example below, I was lucky enought to find a round mousepad that was the perfect size. You can also use cardboard or other stiff materials as the needed stiffener.
Obviously if you are going to line the bag, the stiffener piece (or here, the mousepad) will be on the inside of the bag. And the lining will hide it.
Alternative: Double Crocheted Base Layer
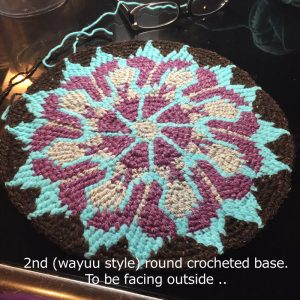
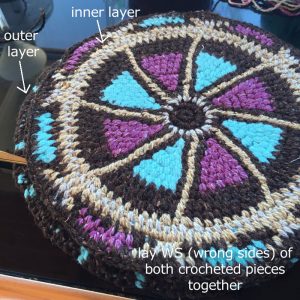
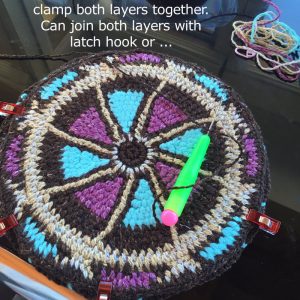
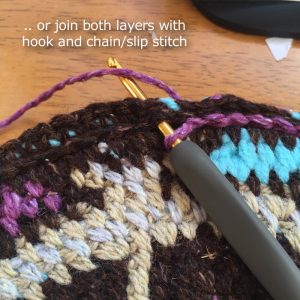
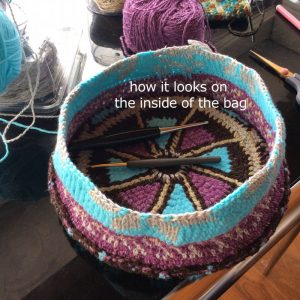
You can also have a double layered, crocheted bottom. This is what I did in the illustrations below. I decided that the crochet piece above would be on the inside of the bag. I crocheted another round piece (wayuu style) which would be used on the outside of the bag’s bottom. Join both layers together to create a thick, cushiony, very strong base.
If you go with a double layered bottom, you would most likely choose not to have lining for the bag. Or just lining on the sides of the bag so as not to obscure your lovely crocheted bottom on the inside of the bag.
Graphing Patterns for your Tapestry Crochet Bags
Determine how big the base of your bag is as you crochet the base. As soon as you determine the size of your bag’s base, you will also know the number of stitches you will need to make up the sides of your bag (i.e. number of stitches on circumference of bag’s base).
Once you know the number of stitches you will need, you can then begin to graph your pattern.
For example, for the “Cat & Fishes” tapestry bag, the graph was for 160 stitches round and 70 stitches height (to where where the grommet holes will be). In this case, I was using yarn that was deemed suitable for 4mm knitting needles (but I used 2.5mm crochet hook for a firmer fabric).
Holes for Drawstring
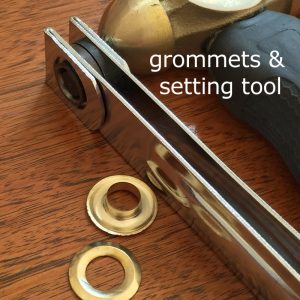
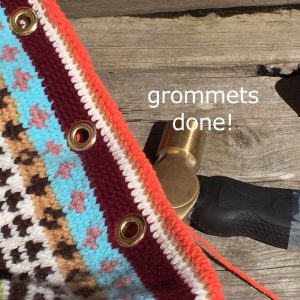
Crochet according to graphed pattern till you get to height of where the holes of the drawstring are to be. In the traditional Wayuu Mochila bags, the holes are just holes worked as part of the crochet. However I do love bits of hardware. And they do add something professional and delicious to any piece of work. So instead of just crocheted holes, I add grommets (large metal eyelets) for the drawstring (to be made later).
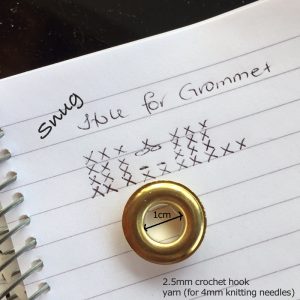 First determine the size of your grommet. In this example shown below, the inner hole diameter is 1cm. I am using yarn suited for 4mm knitting needles (but I am using 2.5mm crochet hook). Those figures will give you an apporximate idea of the sizing here.
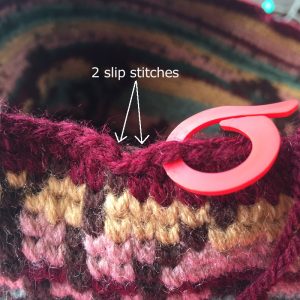
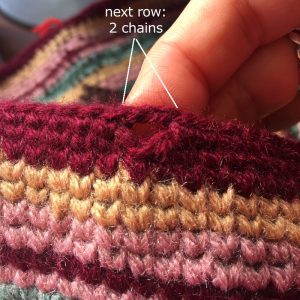
I made the crochet hole along the rows. I made appproximately 10 holes along a 160st circumference.
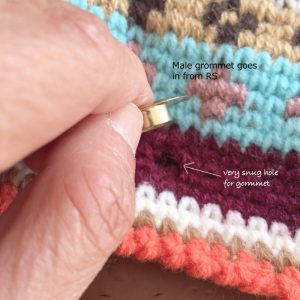
The important thing to remember is that the hole you leave in the crochet fabric must fit VERY SNUGLY around the grommet.
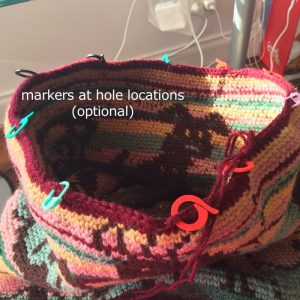
It might also help to use markers at holes as the holes can seem to “disappear” because they are rather small. Leave the markers in place till you do the grommets. You can easily find the holes that way.
After you left the holes in the crochet, carry on crocheting till the end. Fasten off. You can add the grommets when that is done.
Crocheting the Drawstring Cord
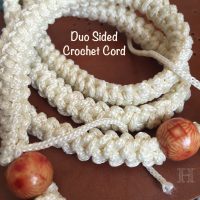
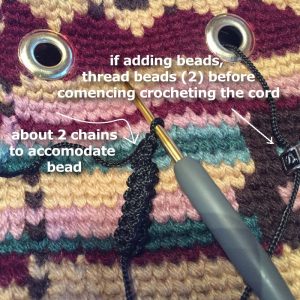
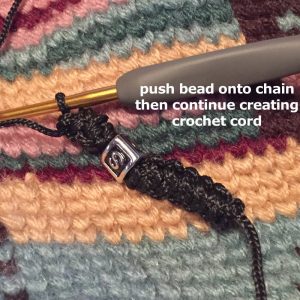
You can of course use any kinds of suitable cord as your bag’s drawstring cord. I often like to crochet mine. I use the Duo Sided Crochet Cord method for many of my tapestry crochet bags.
You can also add large beads towards the end of the cord. The beads, if larger than the grommet holes, will act as stop beads. Your drawstring cord then be secured to the bag while allowing free drawing movement of the cord.
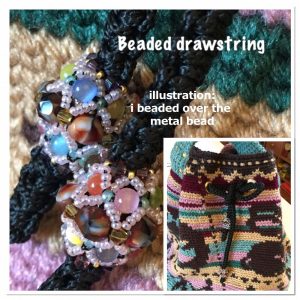
 Basic instructions are in the photos below. Note that in the illustration below, I prettied up the metal bead by beading over the bead. The pattern for that pretty beading was from Beaded Bead tutorial by Sidonia, on YouTube. A good tutorial!

Why do you call it the ‘shallow’ double crochet stitch? It is just ‘double crochet’. ???
Hi Julie, sorry I had incorrectly linked the needed photo. (Now corrected). When you click on the photo, you should be able to see a larger photo – whereby you can see the photo better, including the instructions. From there, you can see why it is called a “shallow” double crochet as the stitch is not done in the normal way. Rather the hook is inserted further down which results in a shorter (or shallower) row height. The name of that stitch is not made up by me but comes out of a book on crochet stitches. Have a look at the (larger) photo now that it is correctly linked. Hopefully that will make things clearer. Thanks for writing in.
Do you typically join rounds or use continuous rounds on the body of the bags?
Hi Amber, where ever possible, I usually use continuous rounds for a truly seamless look on the tapestry crochet bags.
Hi How do we start these rounds? Can you do a step by step please 🙂 Thanks
Hi Allie, thanks for your comments. I would love to do an even more detailed step by step on how to make a tapestry crochet bag. However I just don’t have the time.
Still, you should be able to glean enough to start and figure it out.
As for the rounds you are talking about, do you mean the circular base or the rounds around the body?
For the base, if you don’t want to use the overlay mandala crochet outlined above (and buy the pattern from LillaBjornCrochet) then I would recommend looking up on YouTube for some videos on how to make a Wayuu base. It is just like crocheting a circle.
As for the body, once you have you design (which of course is of your own choice), the you are just crocheting round and round, where each row is a round.
Sorry I don’t have more time to do detailed tutorials.
Good luck.