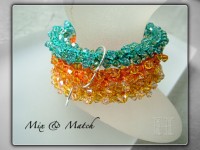
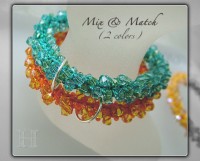
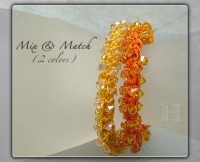
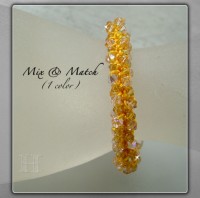
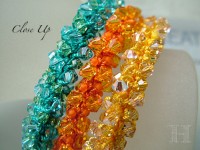
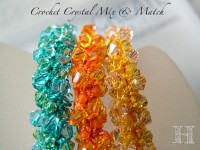
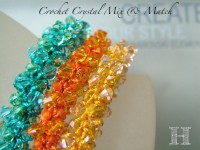
This beaded crochet bracelet is very fun to make and invites an endless array of possible variations in color, yarn type, beads and crystals.
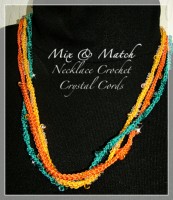
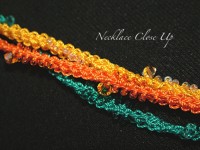
This was done in a set: beaded crochet bracelets and finger crochet necklaces. The set is designed to be colourful, modular and interchangeable. Each item can be worn singularly or in combination.
There is no need of clasps or fasteners. Not even for the crochet bangles as each has enough of a stretch to go over hands comfortably.
- Beaded Finger Crochet Necklace (CH0296)
This modular crochet jewelry set (CH0296) includes 3 beaded (finger) crochet necklaces and 3 seamless beaded crochet bracelets.
How to Make Beaded Crochet Bracelets
Beaded Crochet Bracelet Main Materials:
- Viscose yarn (vintage 1980) from Germany
- Swarovski Crystal bicone XILION 5329 beads – 4mm, 3mm
- #1 Clover Crochet hook
Sidenote: The silky viscose yarn I used is slightly thinner than a 2-ply cotton yarn.
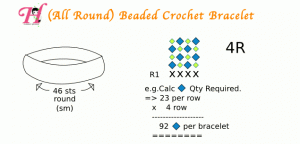
Illustration to the right is a quick digital translation of my original rough-as-guts sketch. The illustration will help to give you some idea of the underlying basic pattern.
Calculating Beads Required
Using the illustration as an example:
- small size bangle, over 46 stitches per row
- beaded crochet bracelet was done over 4 (beaded) Rows (excluding foundation single crochet row – show as “x” in illustration)
- each row is made of Bead-A, Bead-B (which I will refer to as “A” and “B” from now on)
- each row alternates: if row #1 is in sequence A-B-A-B beads, then row #2 will be in B-A-B-A sequence.
Tip: use Even number of stitches per row. The even number of stitches makes it easy for you to alternate A-B-A-B in one row and a B-A-B-A sequence in the next row. This is especially needful if your beads are of 2 different sizes. Like here in this beaded crochet bracelet set, I alternate 4mm and 3mm in each row. The even number of stitches per row ensures that bead A will sit on top of bead B in each sequential row, providing an even smooth-ish surface.
Steps in How to Make a Bead Crochet Bracelet
- Thread on Beads: Before you start crocheting, first string the needed beads onto yarn. (Here in this example as per illustration above, you would be stringing 92 A, and 92 B in A-B-A-B sequence.)
- Foundation Row: Crochet foundation row of 25 chain/slip stitches
- Join into a Round: join both ends so that it forms a round.
Important: Make sure that row is not twisted when joining. - Unbeaded Row: single crochet one row in the round (46sts) in single crochet stitch (x).
- 4 Beaded Crochet Rows: for the next four rows, single crochet each stitch with a bead per stitch. So you should have 46 beads per row. Sequence will be A-B-A-B on one row, and B-A-B-A in the next row.
Tip: either count number of stitches per row as you crochet or use a marker to denote beginning/end of each row. - Cut off yarn: at the end of the 4th beaded row, cut off yarn – leaving a sufficient length to be used later to sew round the beaded crochet bracelet.
- Fold & Sew: fold in half lengthwise along your beaded crochet bracelet, with beads on outside. Slip stitch invisibly and neatly along the inside circumference.
- End Neatly: end off yarn neatly by weaving securely & invisibly into body of bracelet.
Tip: viscose yarn is lovely but very slippery. Pull out the excess yarn slightly (so the piece will pucker slightly); dab a small amount of (clear fabric) glue towards the tip of the excess yarn. Then snip off yarn (after the dab of glue). Now ease out any pucker from the bracelet. The glue bit will slip invisibly back into the beaded crochet bracelet and will ensure lasting non-slippage over time.
Additional Tips
The A-B-A-B bead sequence can be made of:
- (4mm+3mm) repeats (in same or different colours)
- (4mm+seed bead) repeats
- (4mm+unbeaded-single-crochet) repeats
- it can be any size (not just 4mm) as long as it works!
If you want to include rings (I have used closed jump rings in my beaded crochet bracelet here), you need to include the closed rings before you join your work into a seamless round. That means, thread in your closed ring right after you do the foundation slip-stitch round before joining into a round. From thereon you just continue the work as described above; moving the closed ring along as needed.
- illustration: Beaded Crochet Bracelet
- Beaded Crochet Bracelets & Necklaces (ch0296)
- Beaded Crochet Bracelets + Necklaces (CH0296)
Books Related to Beaded Crochet
To learn more about the fun and joy in beaded crochet, here are some related books that are worth considering.
Beaded Finger Crochet Necklace
These finger crochet necklaces were beaded to complete this modular jewelry set. This was created without crochet hooks (hence “finger crochet” – duh!) and was really fun and easy to do. They are designed for easy-wear as well: no clasps needed, just pull on/off over head.
You can learn how to finger crochet here.
For these beaded finger crochet necklaces, Swarovski crystal beads are strung on and randomly finger-crocheted into the work.
- Beaded Finger Crochet Necklace (CH0296)
- Beaded Finger Crochet Necklace
